Help page for the Clarify Form Identifier
Background
On occasion, while working in the Clarify Classic Client, we come across a form that's not familiar to us, but we need to do some work on. It could be a baseline or a custom form. Trying to find this form in UI Editor is not always easy. It's common that the form name and/or title aren't very descriptive (this even happens on baseline forms).
The Clarify Form Identifier can help. It uses the HTML Help feature built into the Clarify Client to help you determine the exact form ID number.
Usage
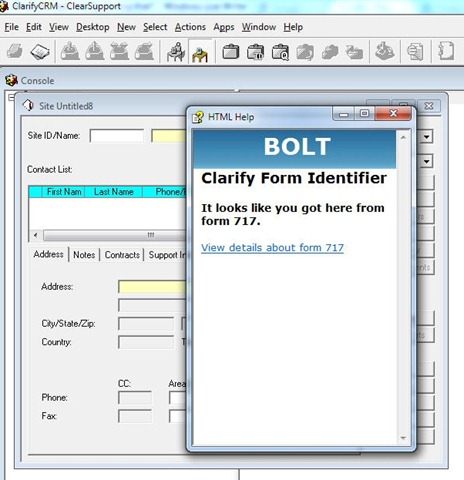
From within the Clarify Client, press the F1 key on a form (or use the Help menu option).
You should see a browser window open that looks like this:
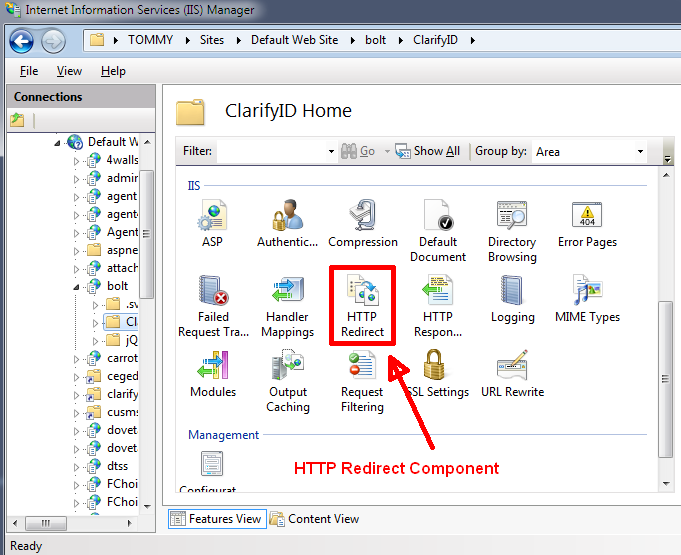
Requirements
- IIS7 or higher
- HTTP Redirect component of IIS
In IIS Manager, you should see the HTTP Redirect component:
If the HTTP Redirection component is not installed
In Windows Server, open Server Manager -> Roles -> Web Server -> Add Role Services -> Common HTTP Features -> HTTP Redirection. Check the box, click Next, click Install.
In Windows 7, Start -> Control Panel -> Programs and Features -> Turn Windows Features on or off. Expand Internet Information Services, then World Wide Web Services, then Common Http Features. Select HTTP Redirection, and then click OK.
You can also use the Web Platform Installer to install HTTP Redirection. Click the Web Platform tab and under the Web Server heading click Customize. In the Common HTTP Features section, check HTTP Redirection and click Install.
Setup
Help enable your database
Import the $bolt/files/help.dat file using dataex, DIET, or UI Editor
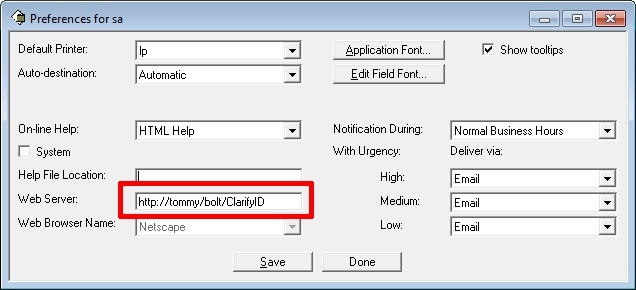
Configure your Clarify Client
- In clarify.exe: Desktop --> My setup --> My preferences
- set the web server to: http://server/bolt/ClarifyID (where server is the web server running BOLT)
- set the help file location to be blank
- set the on-line help drop down to be HTML Help
Need more help?
Contact us at support.dovetailsoftware.com.